[AD 0] Setting up an Active Directory Lab
Now that Active Directory has become part of the OSCP exam, it has gained even more interest in the pentesters world. Setting the whole thing up is not too complicated, but it can be intimidating if you don’t have much experience with Windows Server. Hopefully, this post will guide you through the installation so that you can have your own lab. In further posts, I want to go through some attacks, although this one is just for the installation.
Index
Setting up the Domain Controller
The Domain Controller is where the administration of the whole Domain takes part. Here, we set up user accounts, groups, privileges, shared folders, and virtually everything. We define what our local domain has to be like, and users joining that domain will be able to do whatever we want them to do.
During pentesting, the ultimate goal is to become Domain Admin, which in turn is having full control of the domain.
Please note that being a Domain Admin is different from being a Local Admin. Domain Admins can change, set or un set anything related to the domain, while Local Admins can do anything related to the local machine without having any repercusion on the domain.
Preface
This will be a Formula-1-themed domain. The accounts will be set up as follows:
Administrator:P@$$w0rd!   # Domain Admin
M.Masi:Password1          # Domain admin too
M.Verstappen:Jasmine1     # Domain user and local administrator of machine#1
L.Hamilton:Welcome1       # Domain user
More information on the domain:
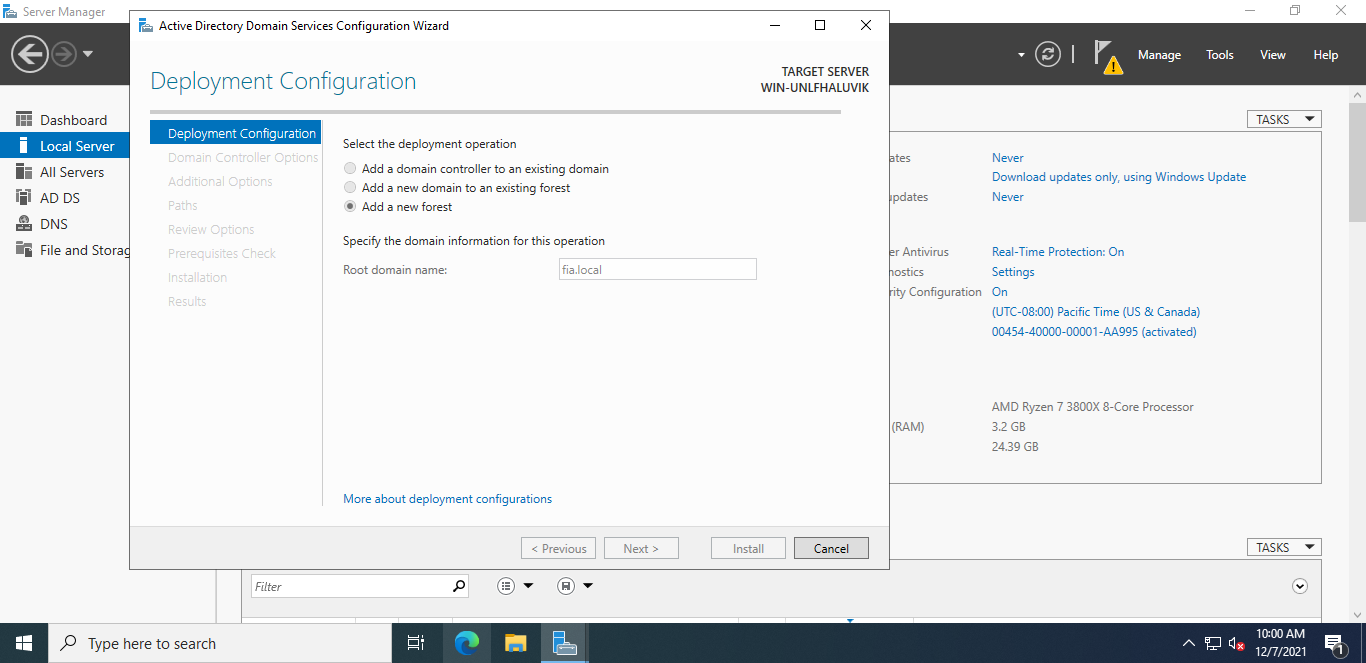
Domain name: fia.local
Computer name of the domain controller: DC-Server
Download Windows Server
Microsoft provides an evaluation Windows Server ISO that we can use for free. It’s limited to 180 days, but that’s plenty of time for us to play with it. Anyway, if we run out of time, we can always reinstall it.
In this case, I will be using Windows Server 2022.
You can download an .iso here. All you need to do is to file some fields (they can be filled with random information if you don’t want to give personal details to Microsoft) and select the language.
Windows Server Installation
Run the downloaded iso with your preferred virtualization software. I will be using Oracle Virtualbox.
The installation process is very straight forward. I’m pretty sure all of you is familiar with installing Windows so I’m not going to really give more detail on that. The only thing that I really want to point is to make sure to select the Desktop Experience option. Otherwise, we won’t have any interface and we’ll have to do everything from a shell.

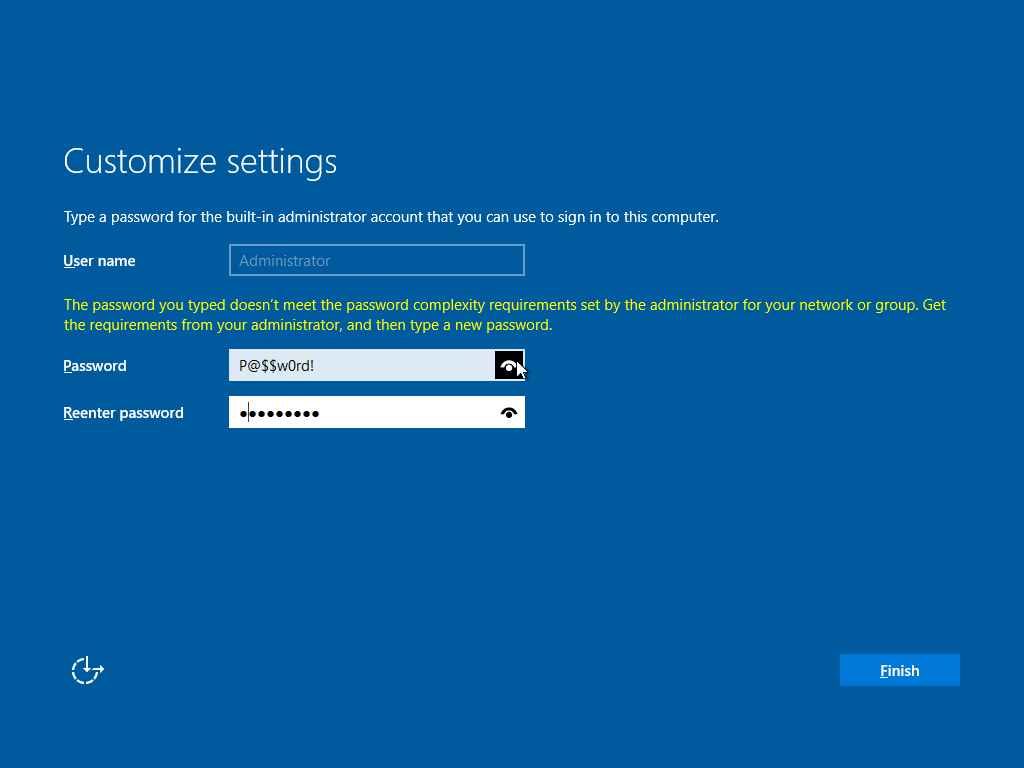
And voilà! That’s Windows Server installed.
Time to install Guest Additions and we have a machine ready to use. If you don’t know how to install it, there are tons of tutorials out there. It’s out of the scope of this guide.
Active Directory Installation
So far, we have only installed Windows Server, but now we have to install Active Directory.
Click the Windows icon on the taskbar and open Server Manager. This is what it looks like:
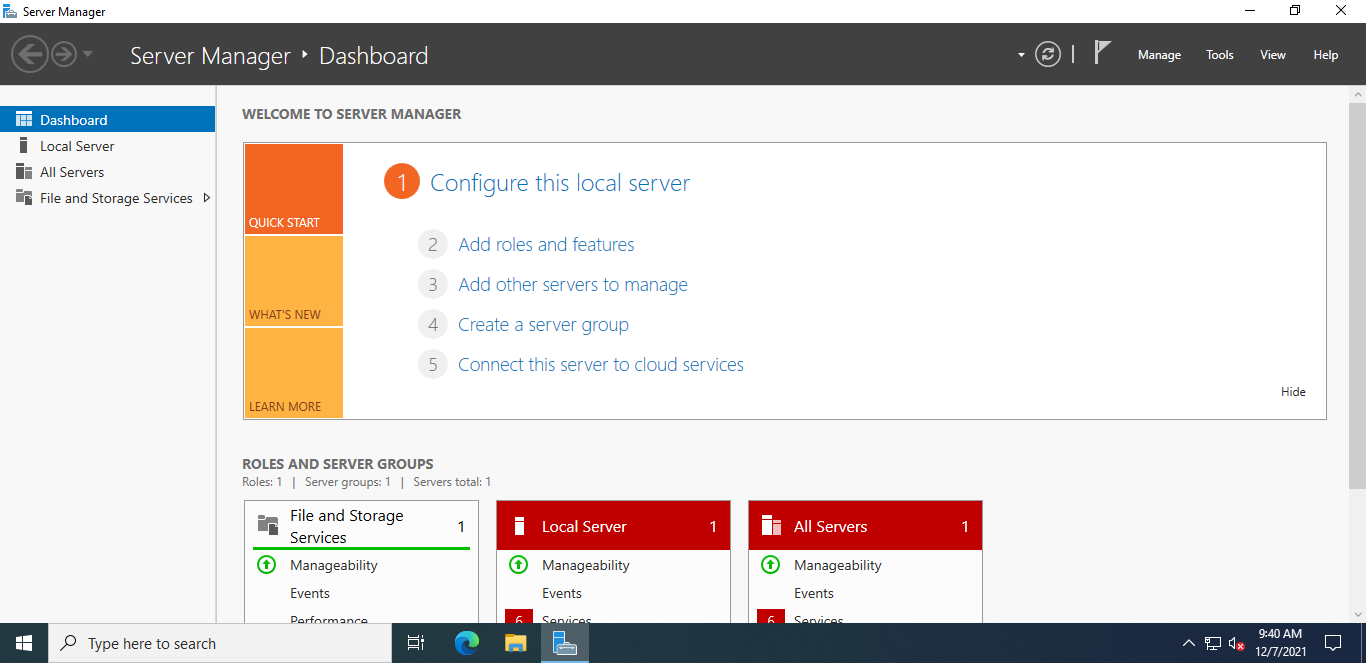
This is where we will administrate the whole domain.
Creating the domain
Click on “Add roles and features” and follow these steps.
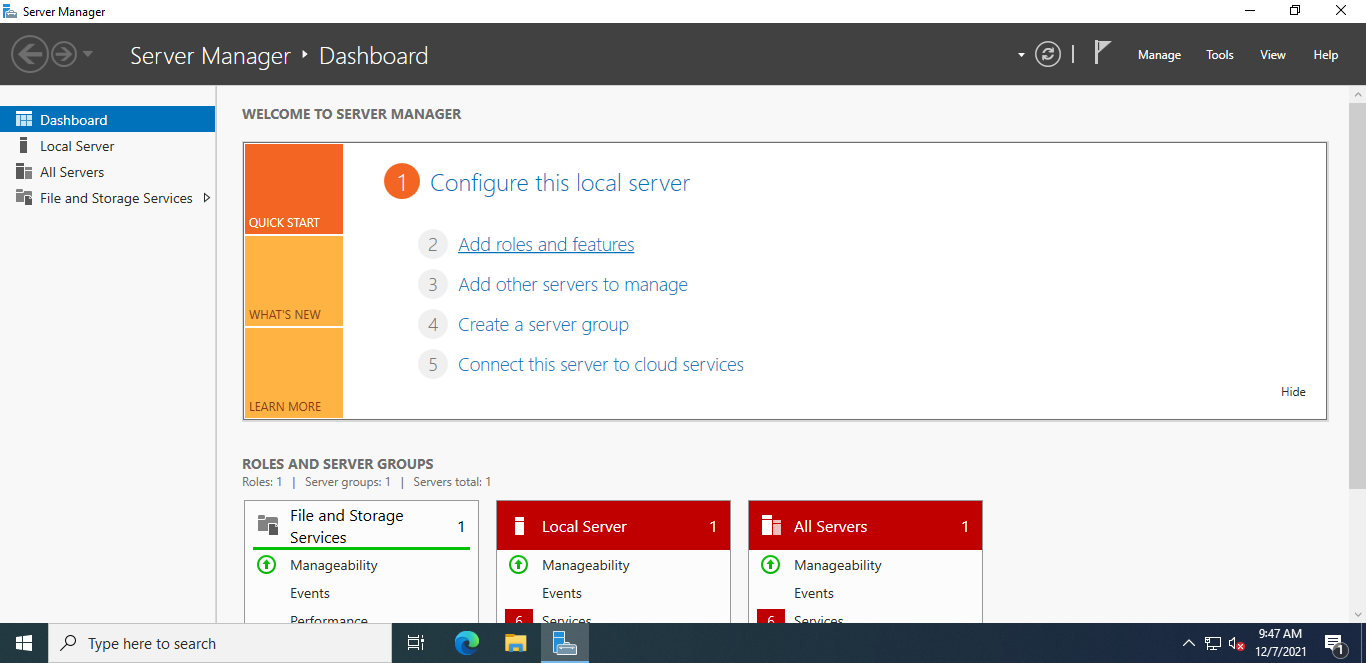
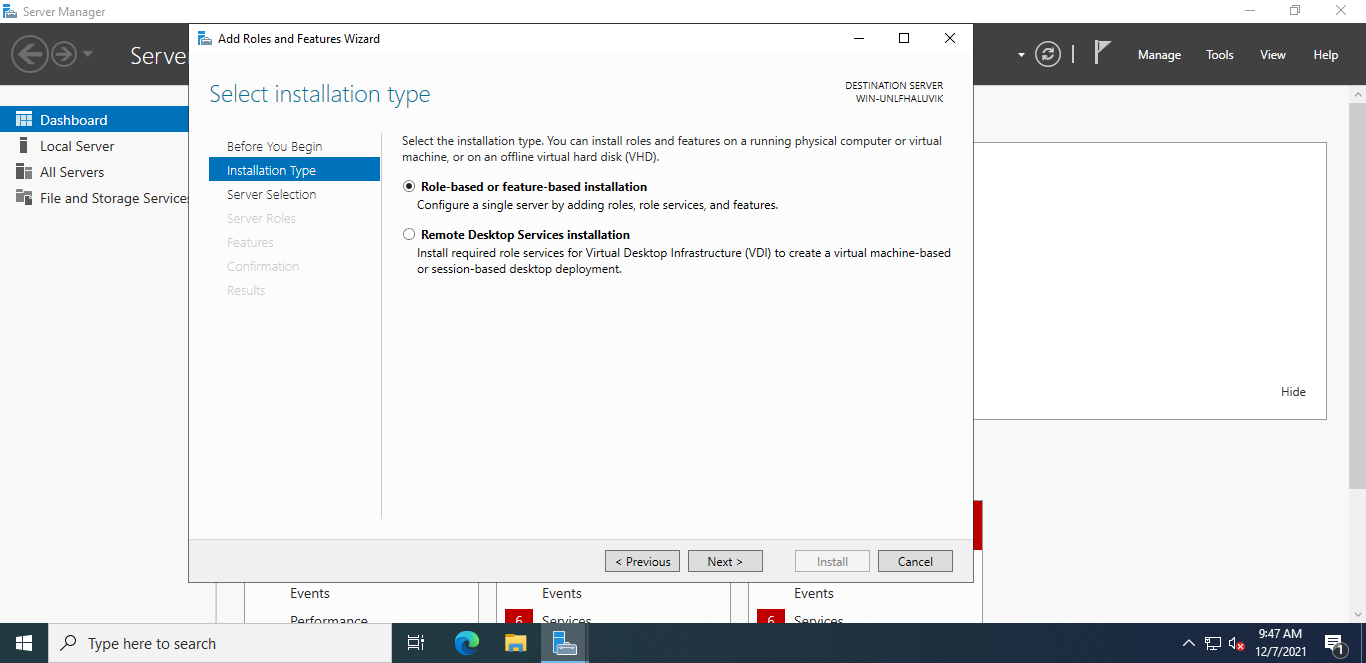
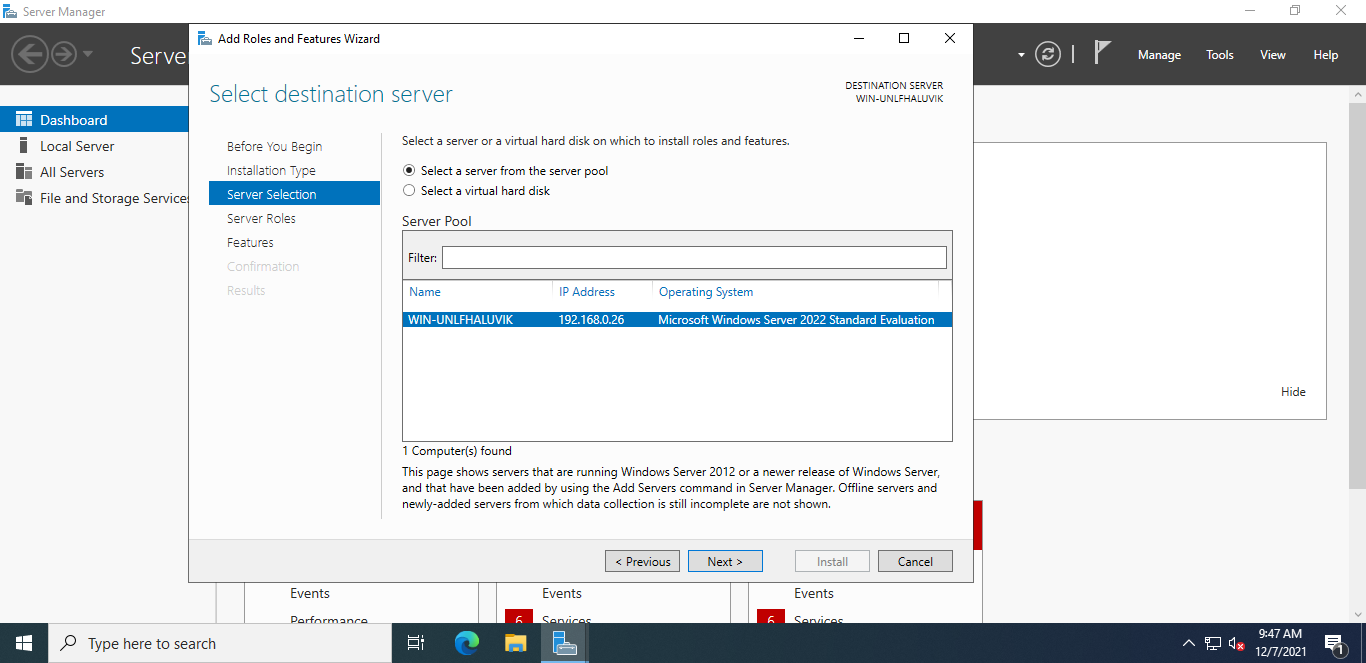
Make sure to install: -> Active Directory Domain Services -> DNS Server
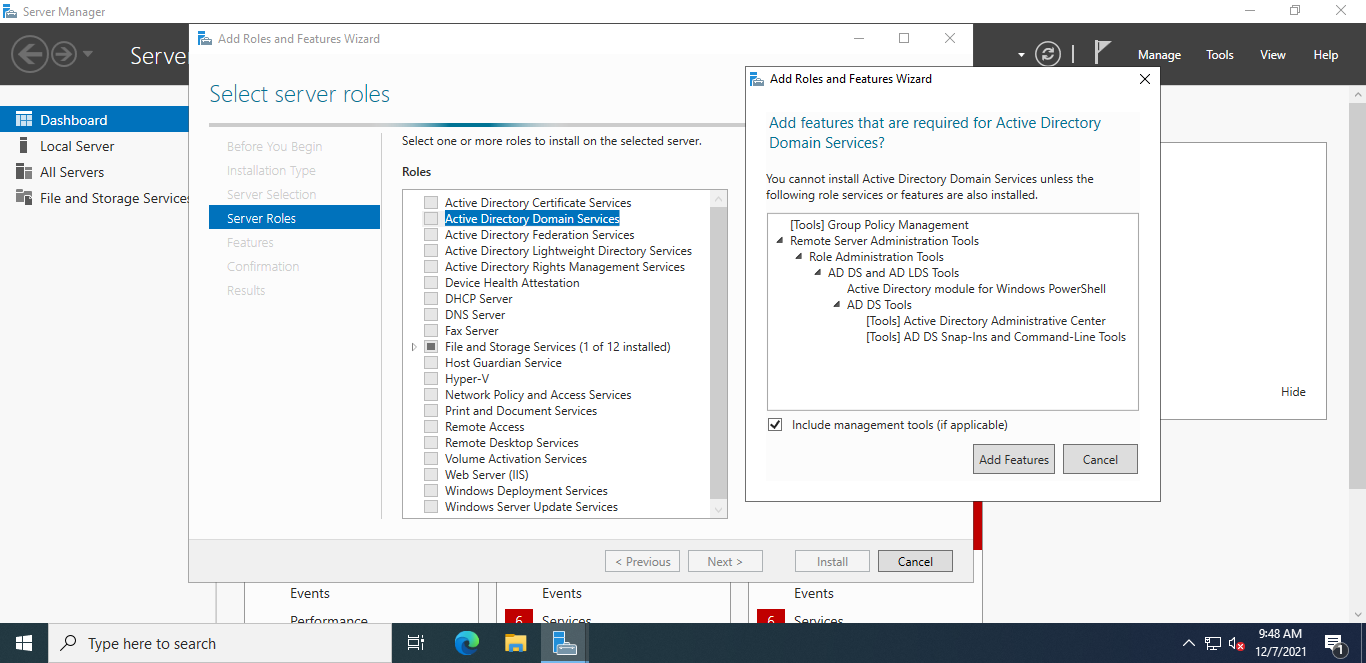
The Domain will start getting installed.
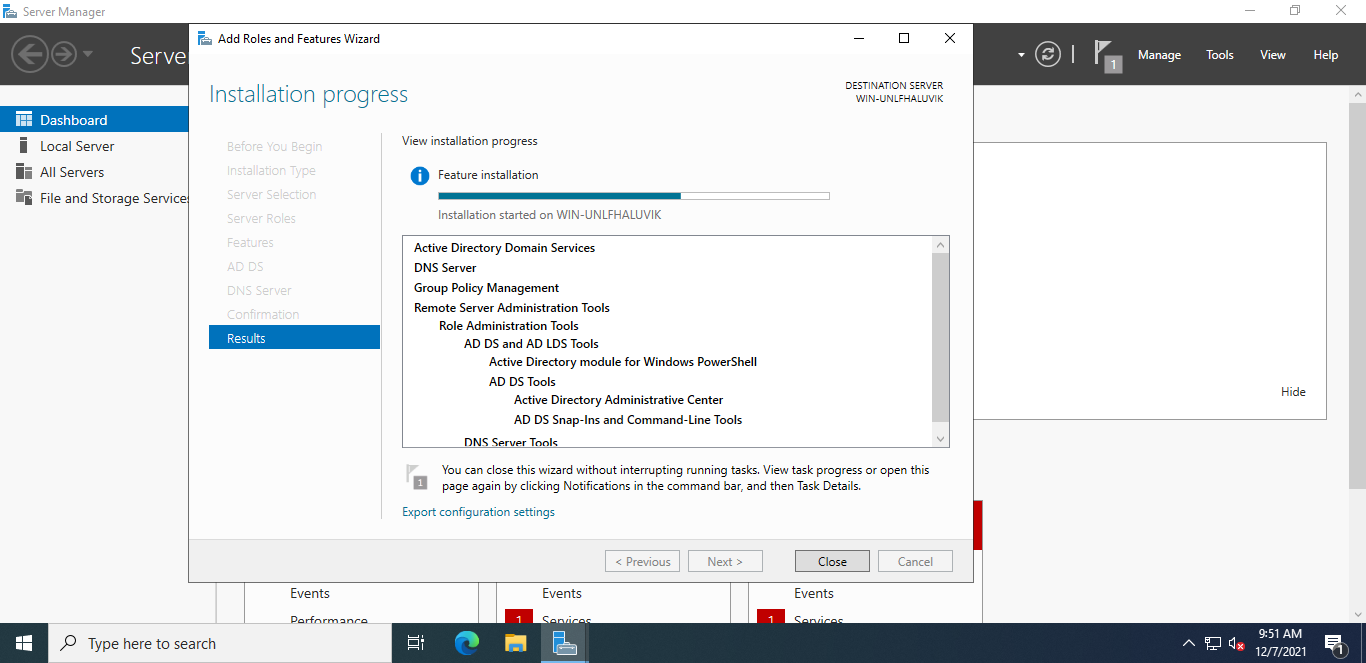
Renaming computer
Active Directory has been installed. Before continuing, we want to change the Computer name from WIN-UNLFHALUVIC to something more describing. For that, we right click on This PC -> Properties -> Rename this PC -> Change
- Set the Computer name to DC-Server
This is a good moment to REBOOT the computer.
Adding ourselves as Domain Controller
Make sure you have rebooted at least once after changing the computer name.
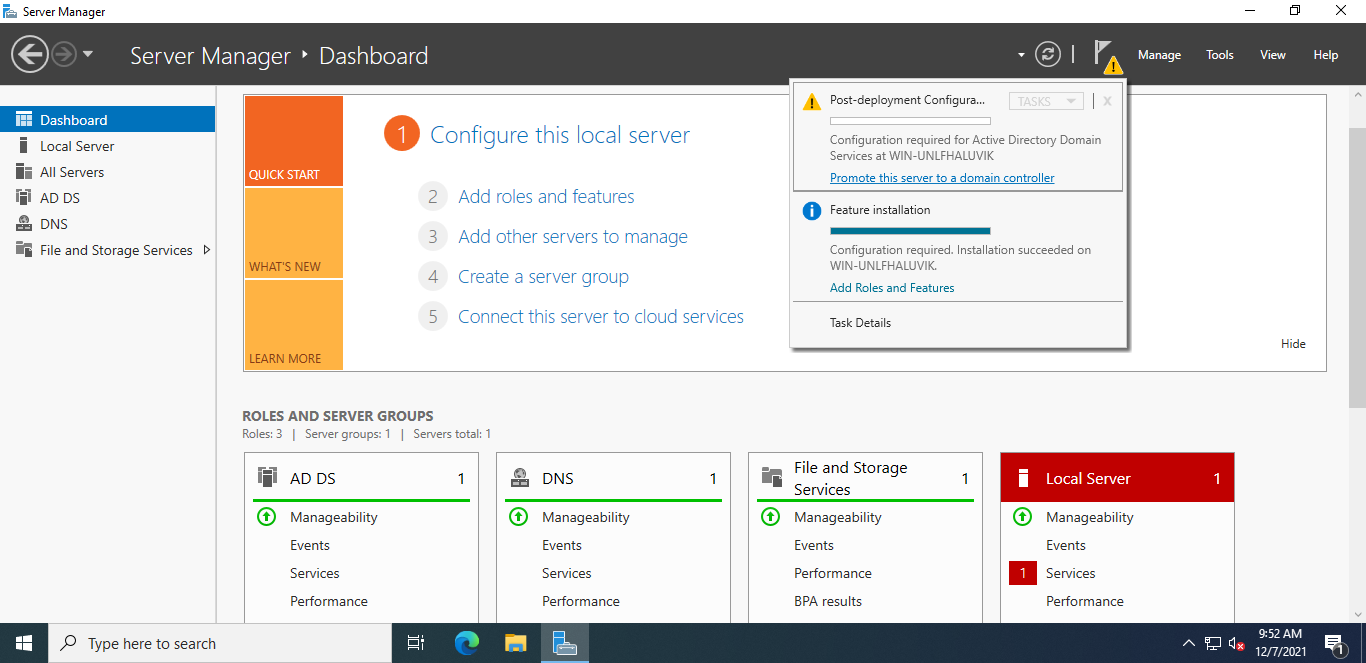
This is called Promoting to domain controller. We can do it by clicking on the alert button and selecting the option. It’s very descriptive.
We will create a new forest where we will specify de details that I provided above.
It will ask for some password. We will choose P@$$w0rd! again, since it is for administrative tasks.
Next, we will skip creating DNS delegation for the moment.
The NetBIOS domain name will be filled automatically according to the information we provided beforehand. Make sure it’s correct and continue with the installation process.
After upgrading to Domain Controller, the system will reboot itself.
Note: If we have some prerequisites failures, it’s because we didn’t reboot before. Do it now and try to promote to Domain Controller again.
After reboot, we can see that we are logging in to the domain, instead of logging in to the local machine.

Creating users in the domain
Now what Active Directory is installed and we are the Domain Controller, we can continue setting up the whole thing.
This time we are going to create the domain users, so that users (employees) can login to the domain from client machines.
For that, we open Server Manager -> Tools -> Active Directory Users and Computers. A Window will pop up, and we will browse to fia.local -> Users
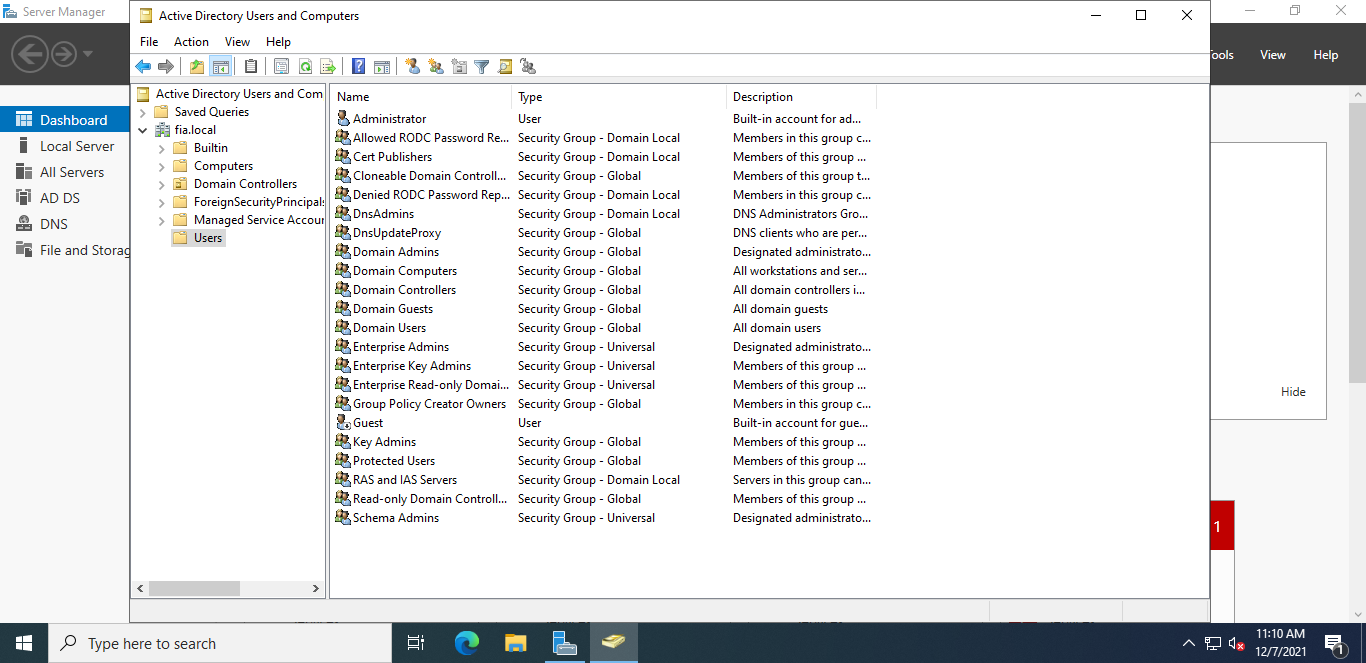
Right-click an empty part of the screen and select New -> User. This is where we will provide all the basic information about the user. For instance, I’m going to create Michael Masi’s user.
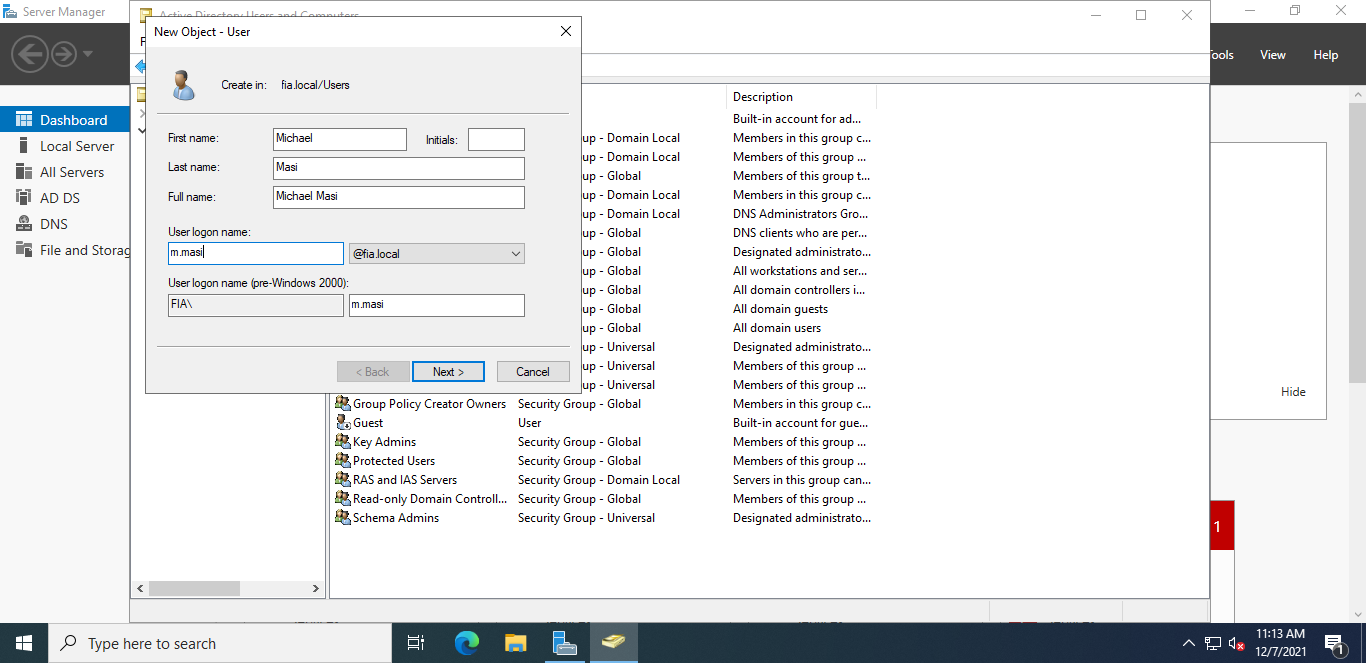
Change the default options to your liking:

And that get’s the user created. But remember, Michael Masi is a domain admin aswell, so we must add him to the Domain Administrators group.
Adding user to a group
Right click on the user -> Properties -> Member Of -> Add -> group name -> Apply
In this case, group name is Domain Admins
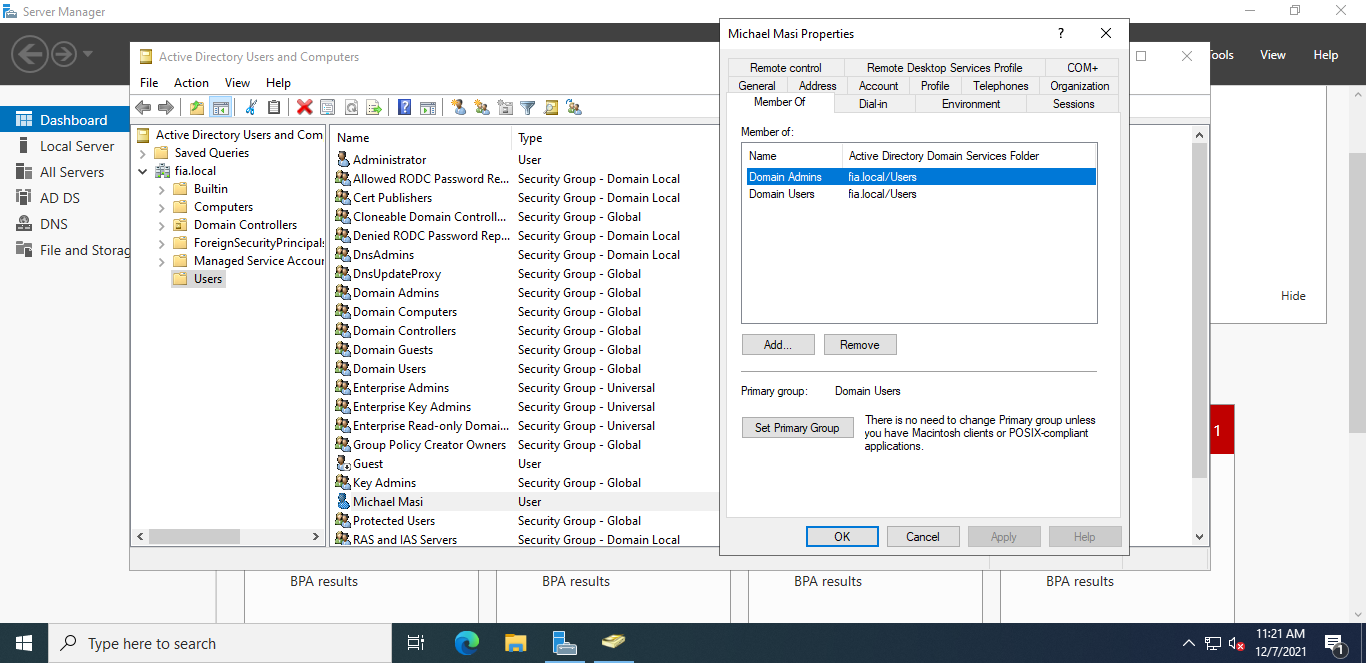
We’ll do the same for Max Verstappen and Lewis Hamilton.
Setting up a client machine
Installing Windows Enterprise
Again, we can use Microsoft Evaluation center to download an iso that we can use for free for 180 days. This time, we are looking for a Windows 10 Enterprise Evaluation, which we can find here
The installation process is again straight forward until you reach the following screen:
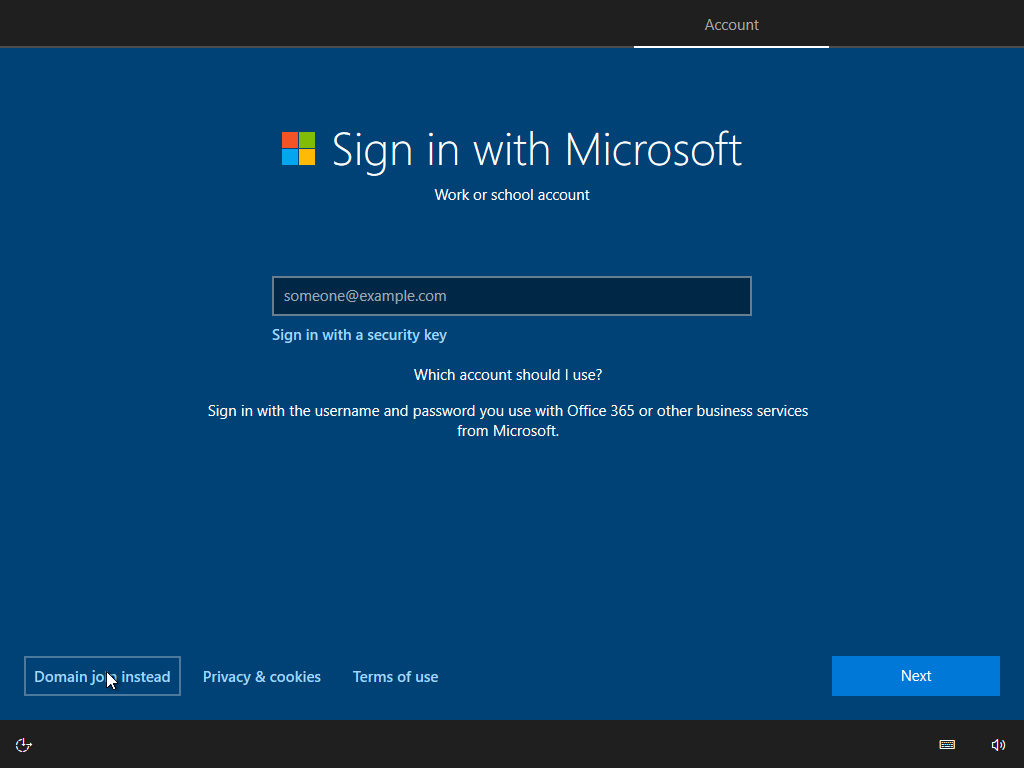
We want to click on “Domain join instead” so we can join the domain we’ve previously created.
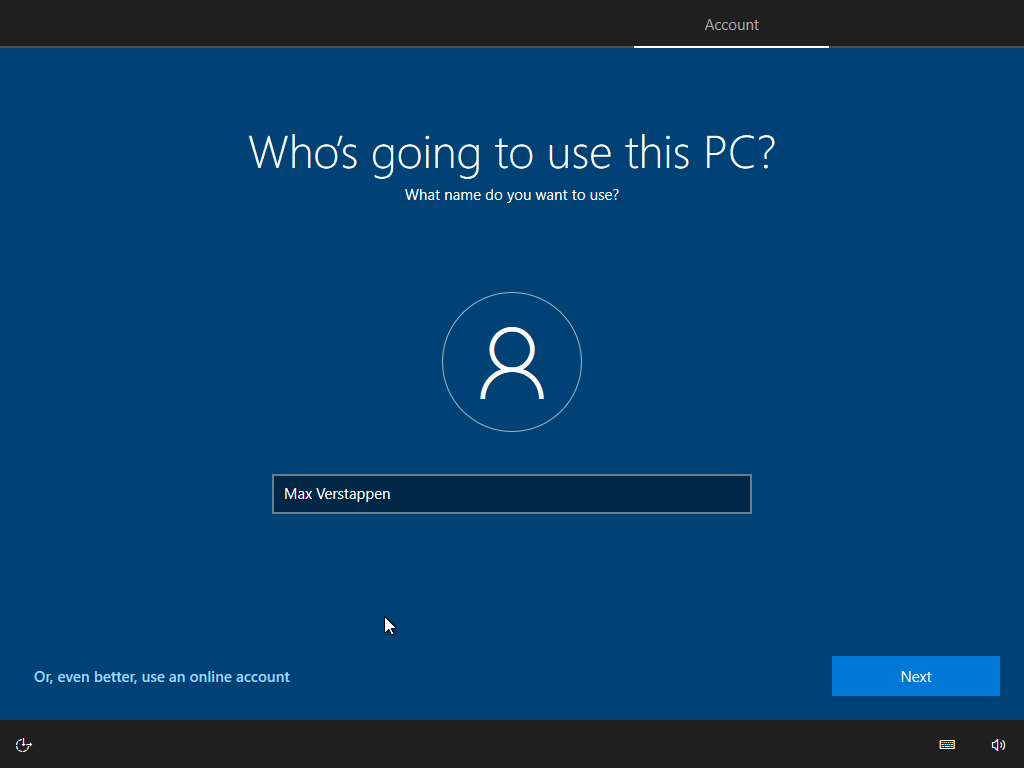
Fill in the password, security questions and try to skip all the optional stuff Microsoft tries to install in your computer. Sooner than later you will end up with a screen like this:
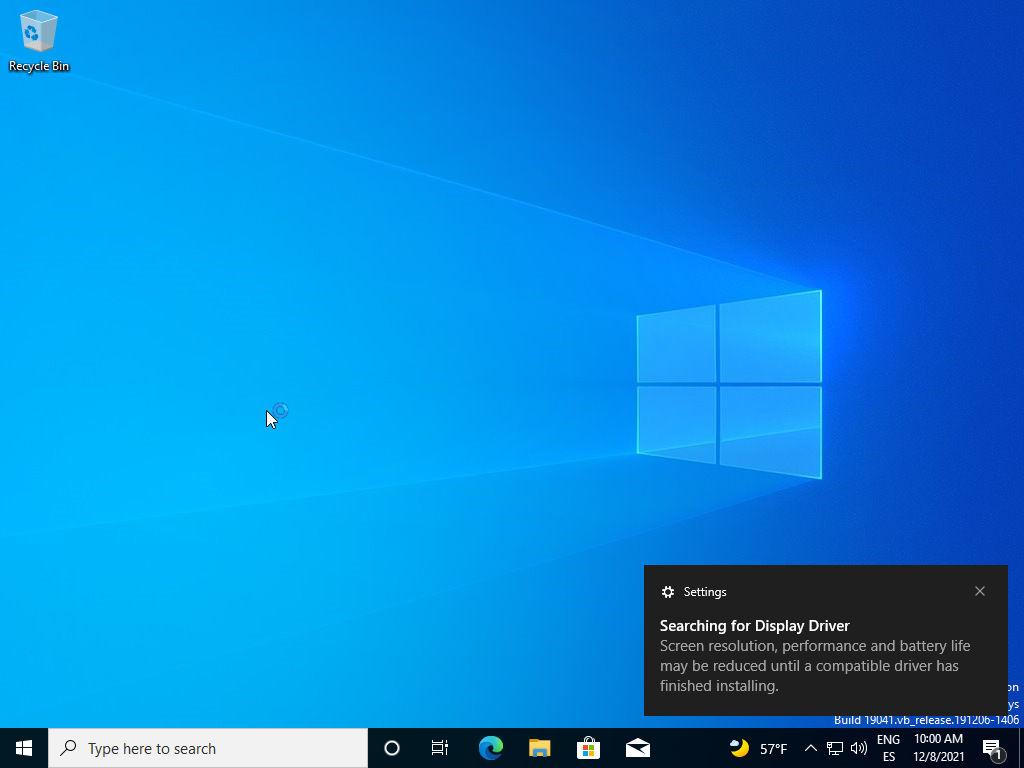
Install Guest Additions (or the equivalent) and you will have a fully functional Client Computer.
Renaming the computer
Again, we want to rename computer. Go to This PC -> Properties -> And change the computer name just like we did before. This will allow for easier recon during our pentesting process.
Configure DNS
If our computer tries to resolve fia.local it will be unsuccessful because we haven’t configured our DNS yet.
Go to Control Panel -> Network and Sharing Center -> Click Ethernet -> Properties -> Highlight ‘Internet Protocol Version 4 (TCP/IPv4)’ -> Properties
We want to set up the fia.local domain with the IP of the Domain Controller. In my case, the Domain Controller is at 192.168.0.26
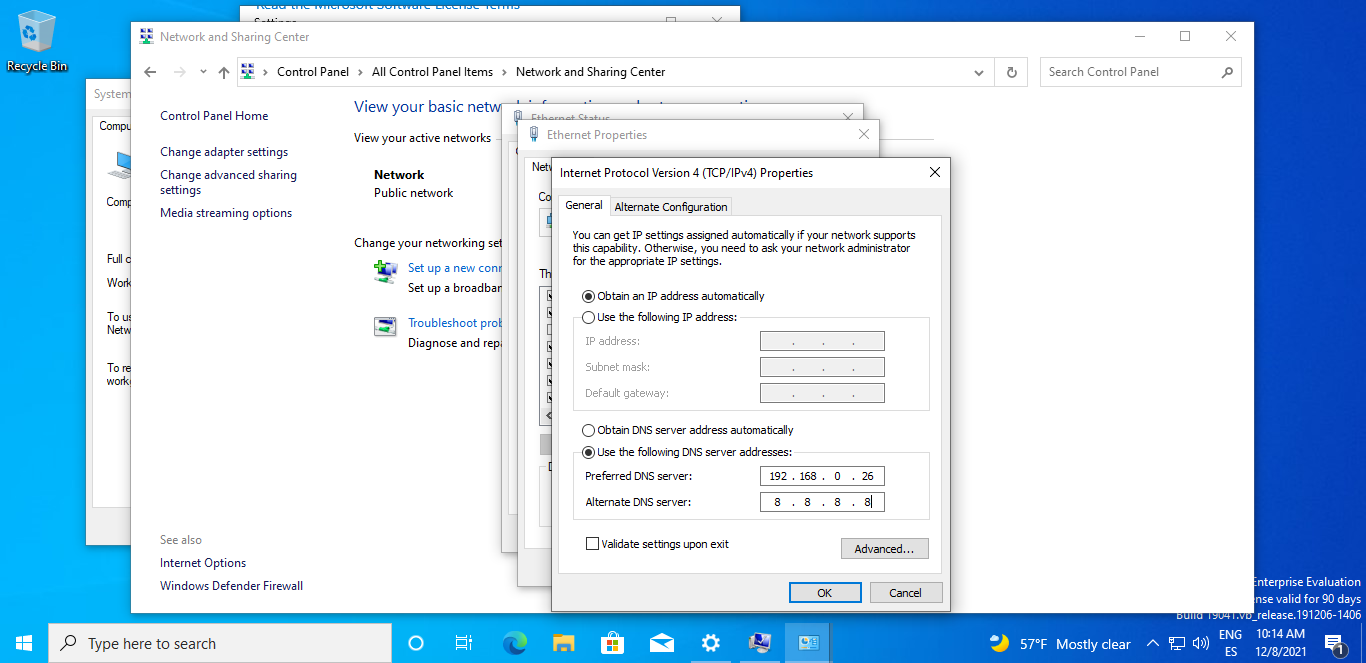
Join the domain
Alright, we’ve installed Windows, but there’s nothing about Active Directory so far. We have logged in to our own account, which is the Local Administrator account, but we haven’t seen fia.local yet!
It’s time to join the domain!
Go to This PC -> Properties -> Rename this PC (Advanced) -> Change… -> Member of DOMAIN -> fia.local
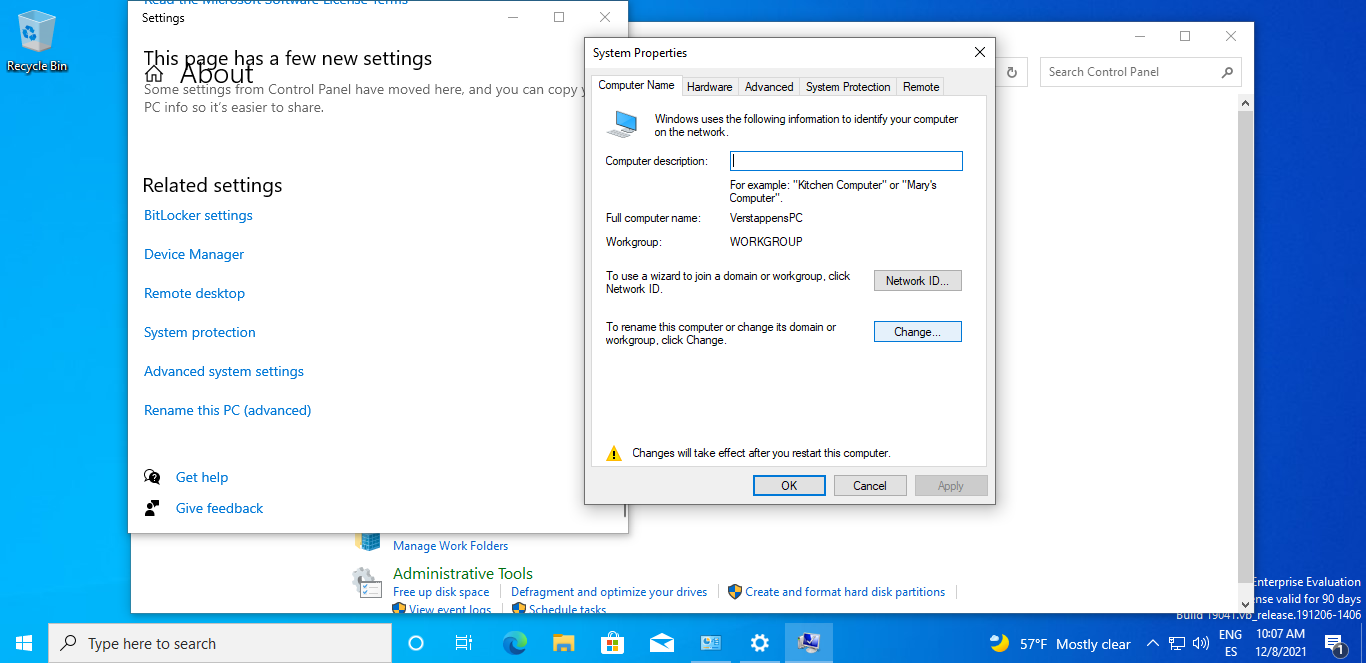
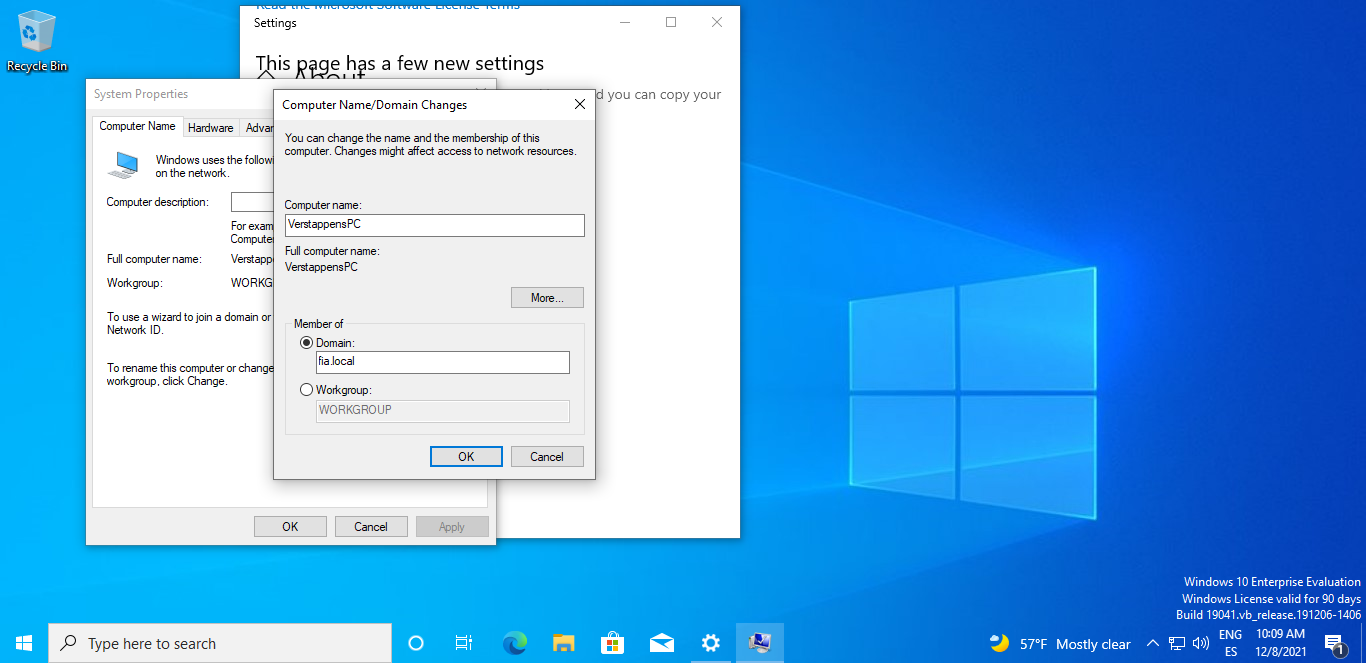
It will ask the namne and password of the account with permission to join the domain. Here, we need to provide the username and password specified in the Server Manager previously. In this case, it will be m.verstappen:Jasmine1.
Restart the machine and we can login into the domain!
Logging into the domain
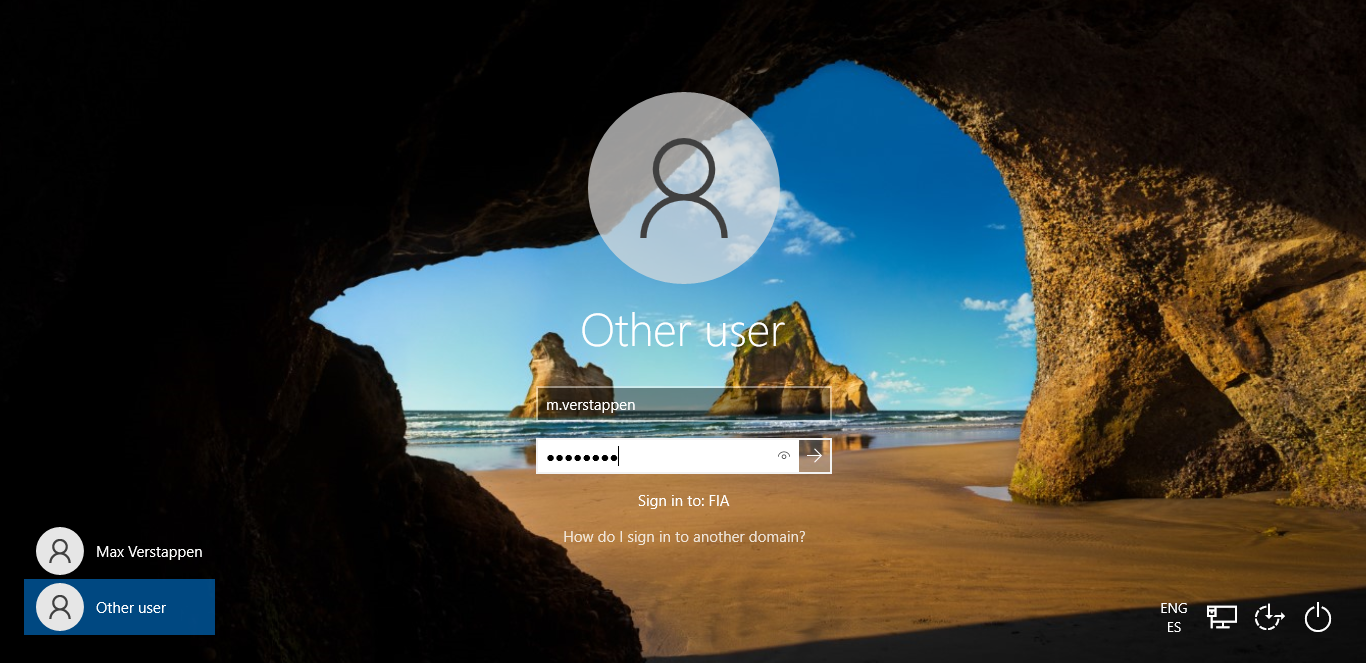
Click “other user” and provide the Active Directory credentials.
Note that you can read “Sign in to: FIA”, which confirms that we are logging into the domain.
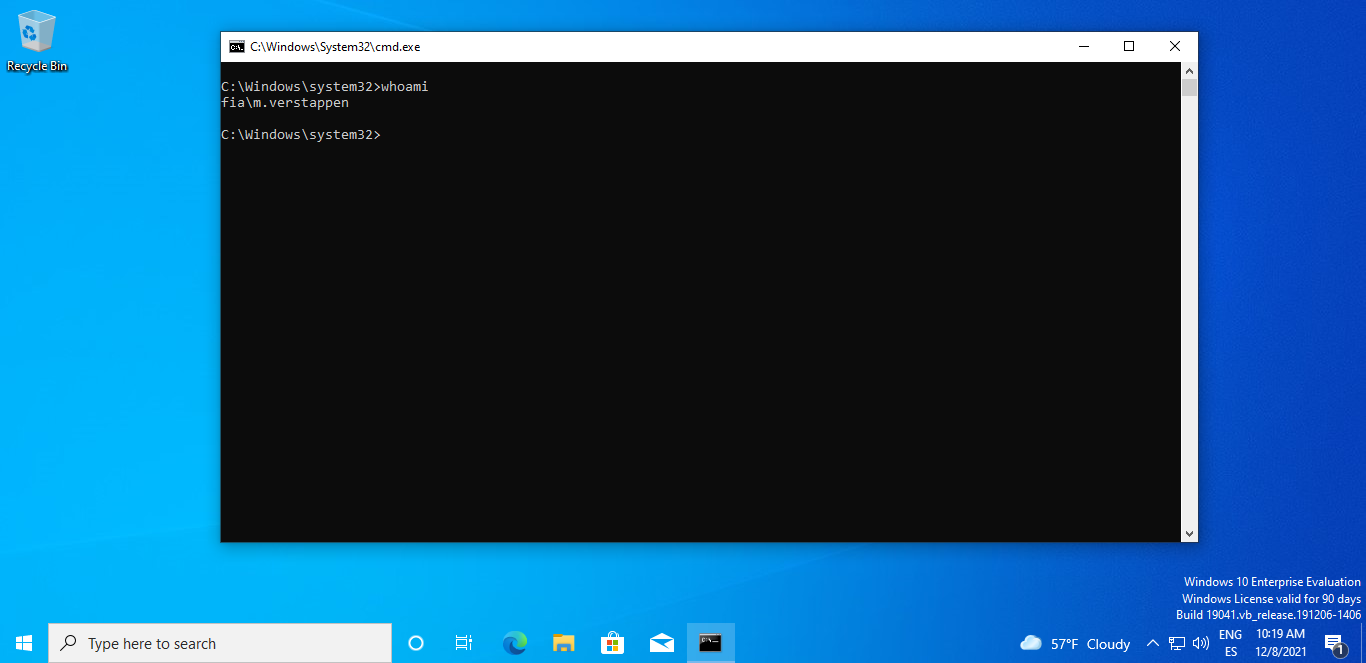
That’s it! We are inside the domain! Let’s confirm it with a whoami command.
